Custom Molding Decoration
As previously mentioned, I really like the results of making my own plinth blocks and rosette moldings. However, store-bought rosettes had one major advantage over mine. They usually had decorative bullseye or flower patterns milled into the face. Nice touch. Since I don't have a CNC milling machine, and didn't care to carve, I figured an additive approach would probably be my best bet. Here's the process I went through.
1. Design Your Decoration
First, you'll need to come up with your decoration. I started working on my design with two things in mind. In terms of execution, I wanted to keep the design fairly simple. I figured fine detail would probably not be visible, would be difficult to paint, and would be more likely to break. Not fun. Secondly, I also wanted my decoration to be fairly square to match the face of the rosette. You certainly could do shapes with more or less than a 1:1 height/width ratio, but I felt that target would look best. Personal opinion.
Creating my own design from scratch is something I intend to do as I finish different rooms. However, for my first attempt, I wanted to see results sooner rather than later. So, I turned to Google Image Search. In this case I was looking for a lion like you'd find on a coat of arms. Searching for "lion heraldry" and filtering on a license that would allow me to share and modify eventually led me to the Macedonian lion by MacedonianBoy. It had a bit more detail than was practical, but I was able to simplify while keeping my favorite lines. Bottom line, searching can help you find good designs.
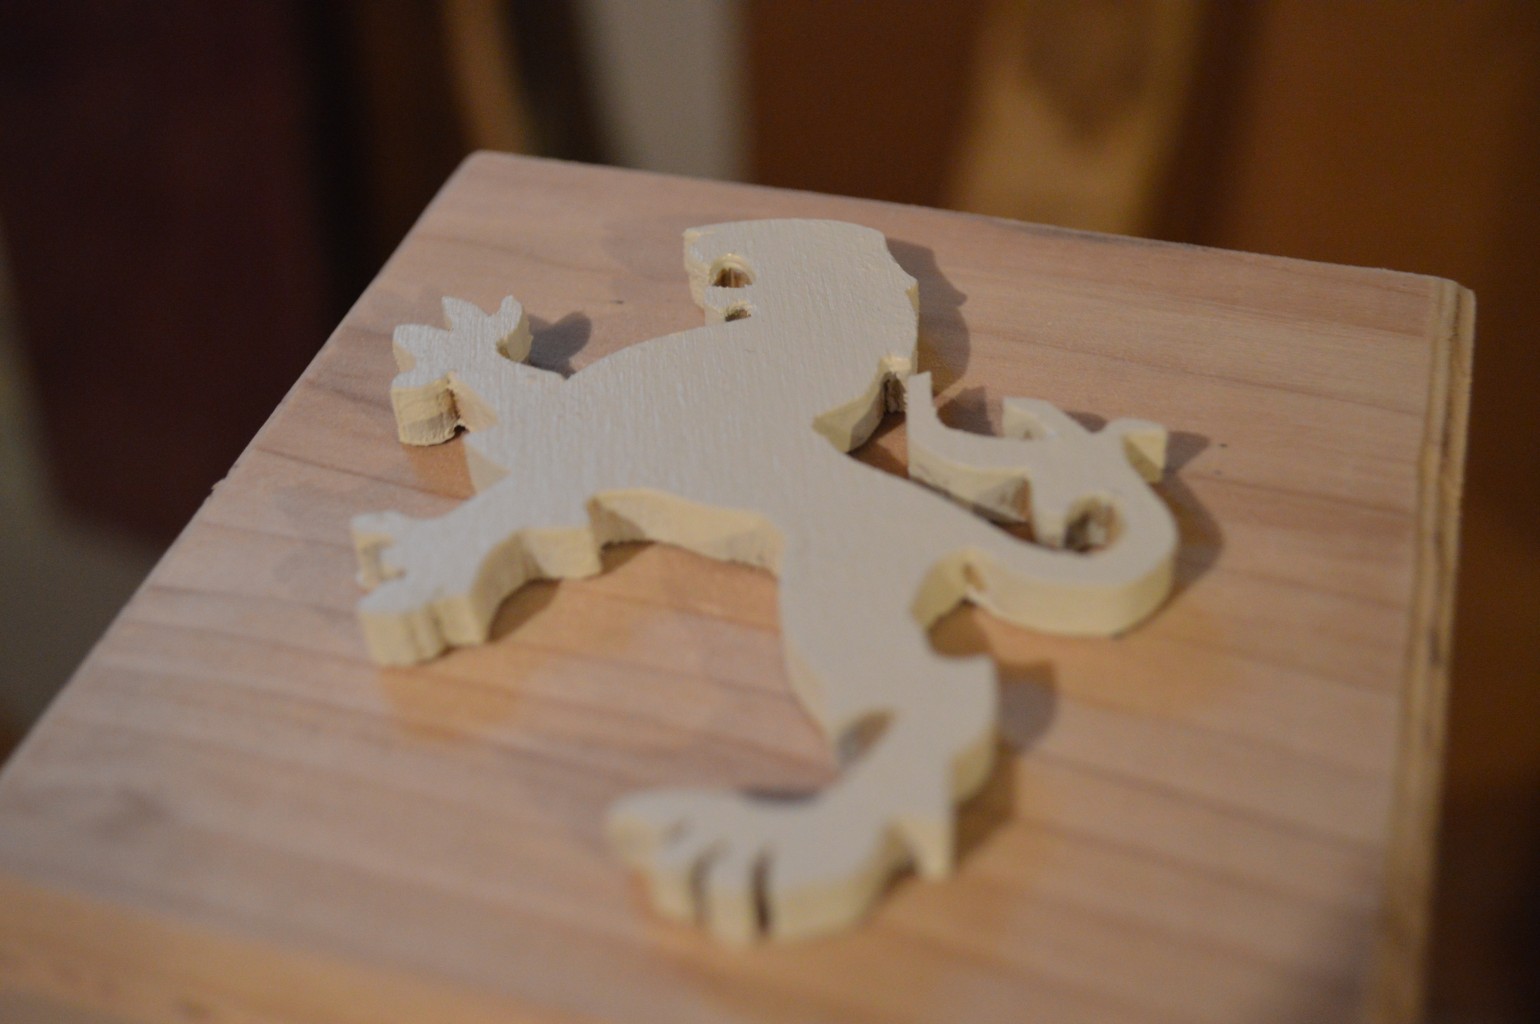
2. Cut the Design From Wood
Next, I scaled the image to a size that would fit well on my rosette blocks and
printed it. I then used carbon paper to trace the major elements to a piece of
1/4" poplar. Note: This is a good time to leave out any details that may be too
fine. Now take the wood to a scroll saw and cut it out. It is OK to leave a bit of
extra wood, especially on the detail areas. Any extra can be more delicately
removed in the next step, filing the edges. I used a set of needle files to smooth
the edges and take off any extra material left from the saw.
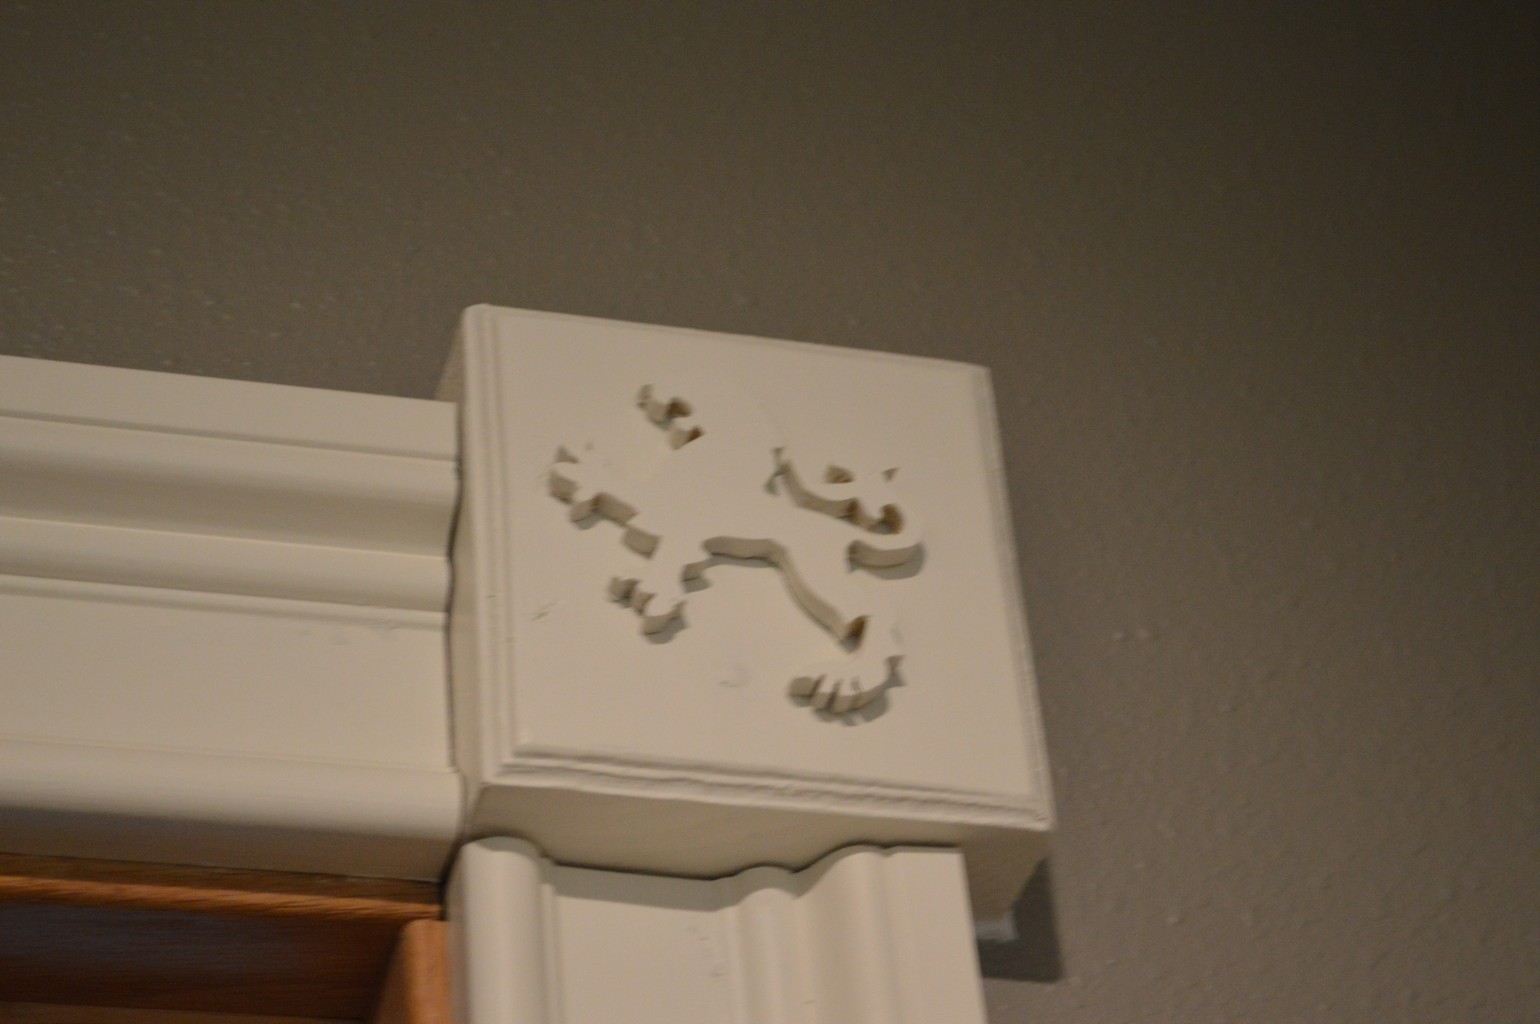
3. Paint
After filing the edges, I primed and painted the decoration. I matched my trim color to make the decoration subtle, but I can imagine scenarios where you'd want different colors to make the decoration pop a bit more. Your call.
4. Install
Finally, I was able to install my decoration. I used hot glue to attach the
lion to a painted, installed rosette block. I went with hot glue because I plan
to eventually build up an inventory of these designs and swap them over time. Hot
glue should allow me to pop off the decoration with minimal damage. But use
whatever glue is right for you.
5. Enjoy
So there you have it. As promised, I think I've put the "custom" in custom molding with these personalized rosette decorations. I really like the possibilities; you could do food-themed designs in the kitchen, toy designs for kids, and on, and on.
I was originally concerned about the 1/4" wood thickness, but found it casts a nice shadow. Any thinner, and I might have needed to contrast the paint a bit.
No idea what my next project write-up will be or when (pushing almost two year since I first wrote about the custom moldings.) You may want to just subscribe to the ATOM feed if you want to be alerted when I eventually do post again.